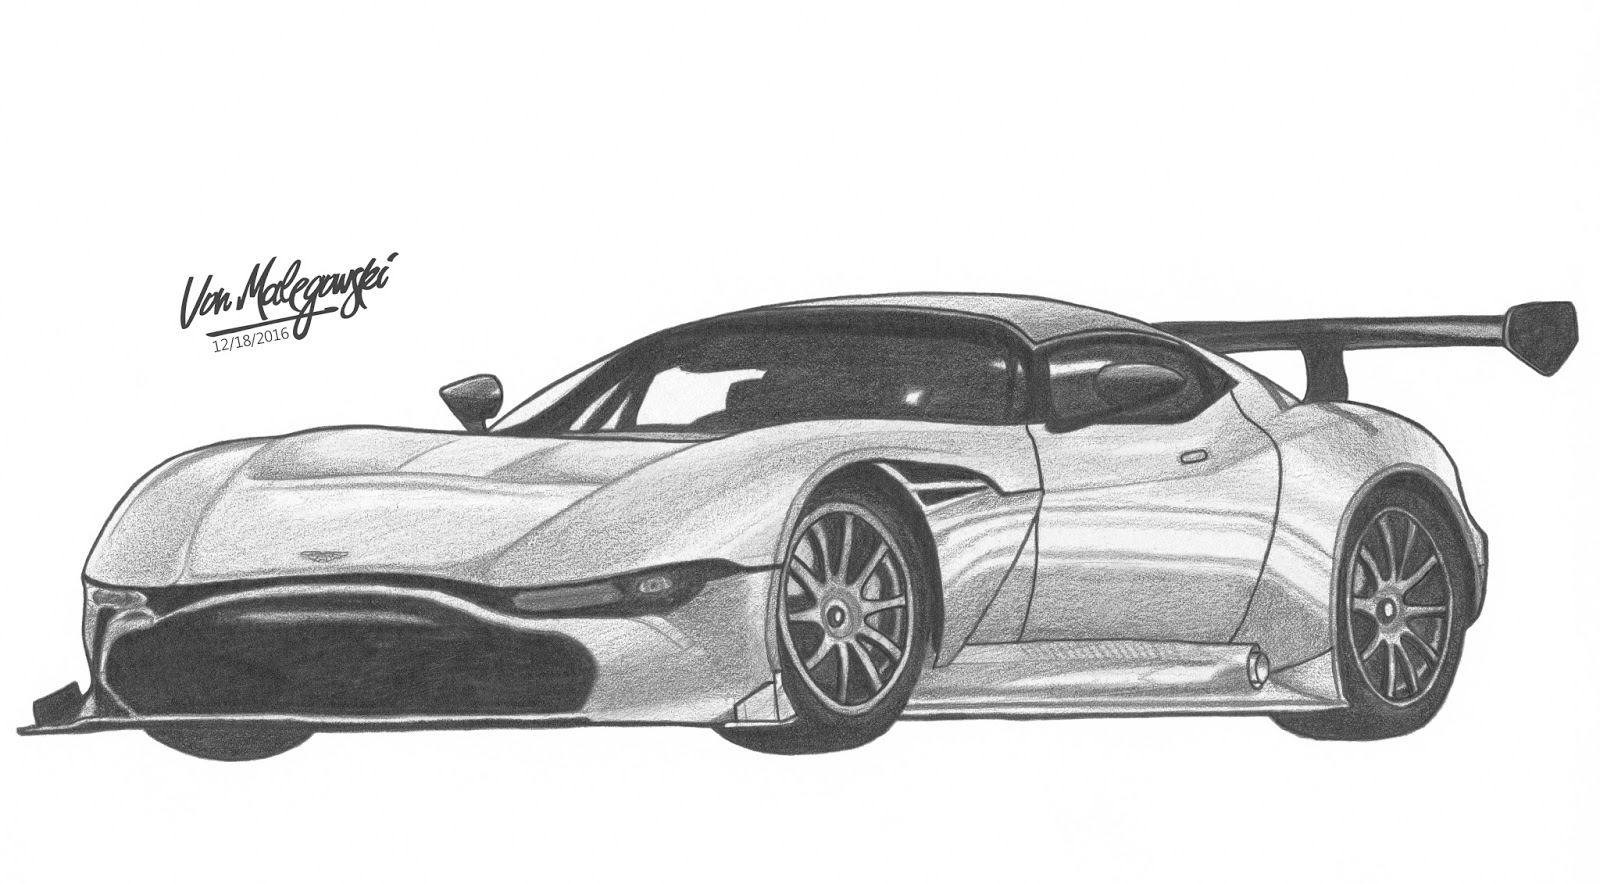
The Aston Martin Vulcan is a car model launched in 2015 by Aston Martin at the 2015 Geneva Motor Show. It is a rear-wheel drive, track-only sports car that runs on a new 7L V12 engine mounted on an aluminium alloy chassis and carbon fibre body delivering 800 brake horsepower (600 kW). The Vulcan is fitted with carbon ceramic brakes, magnesium torque tube with a carbon fibre propeller shaft, limited-slip differential, Xtrac 6-speed sequential gearbox and has a kerb weight of 1,350 kg (2,980 lb). https://en.wikipedia.org/wiki/Aston_Martin_Vulcan
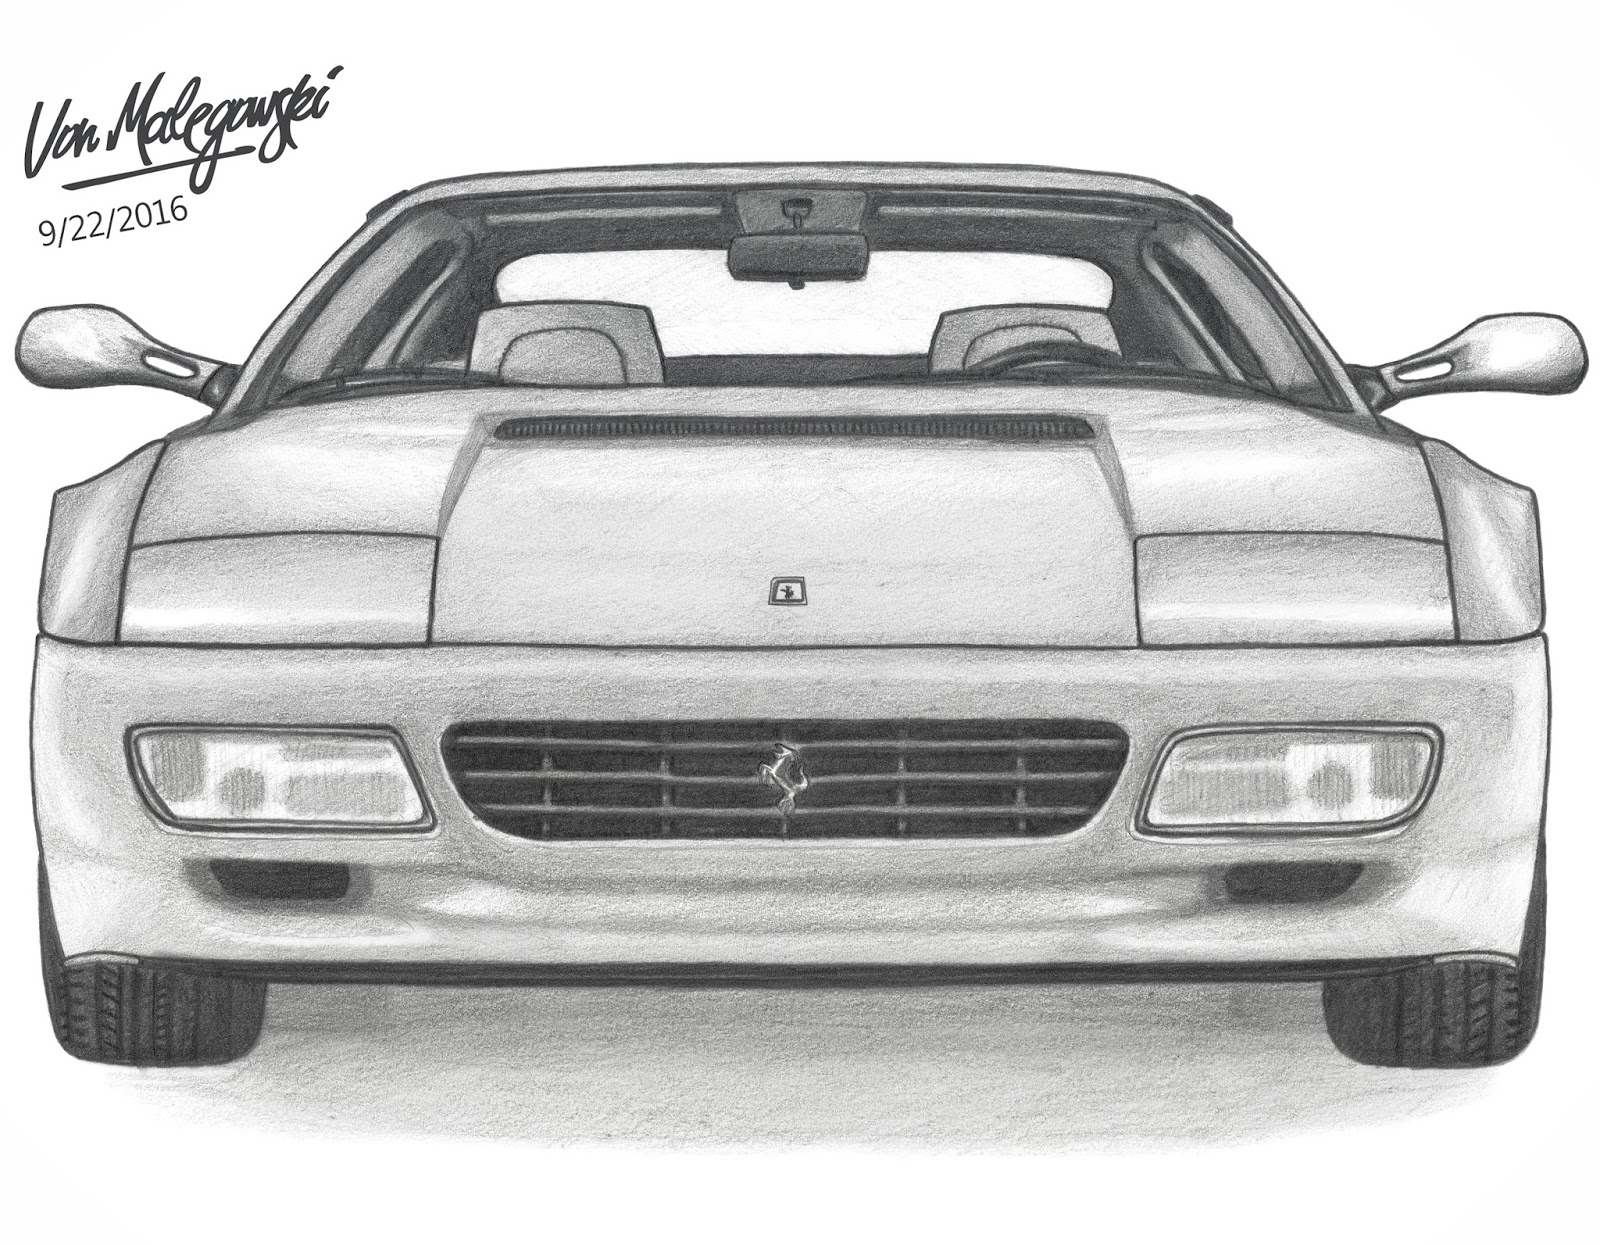
The Ferrari Testarossa (Type F110) is a 12-cylinder mid-engine sports car manufactured by Ferrari, which went into production in 1984 as the successor to the Ferrari Berlinetta Boxer. The Pininfarina-designed car was originally produced from 1984 to 1991, with two model revisions following the ending of Testarossa production and the introduction of the 512 TR and F512 M which were produced from 1992 to 1996. https://en.wikipedia.org/wiki/Ferrari_Testarossa
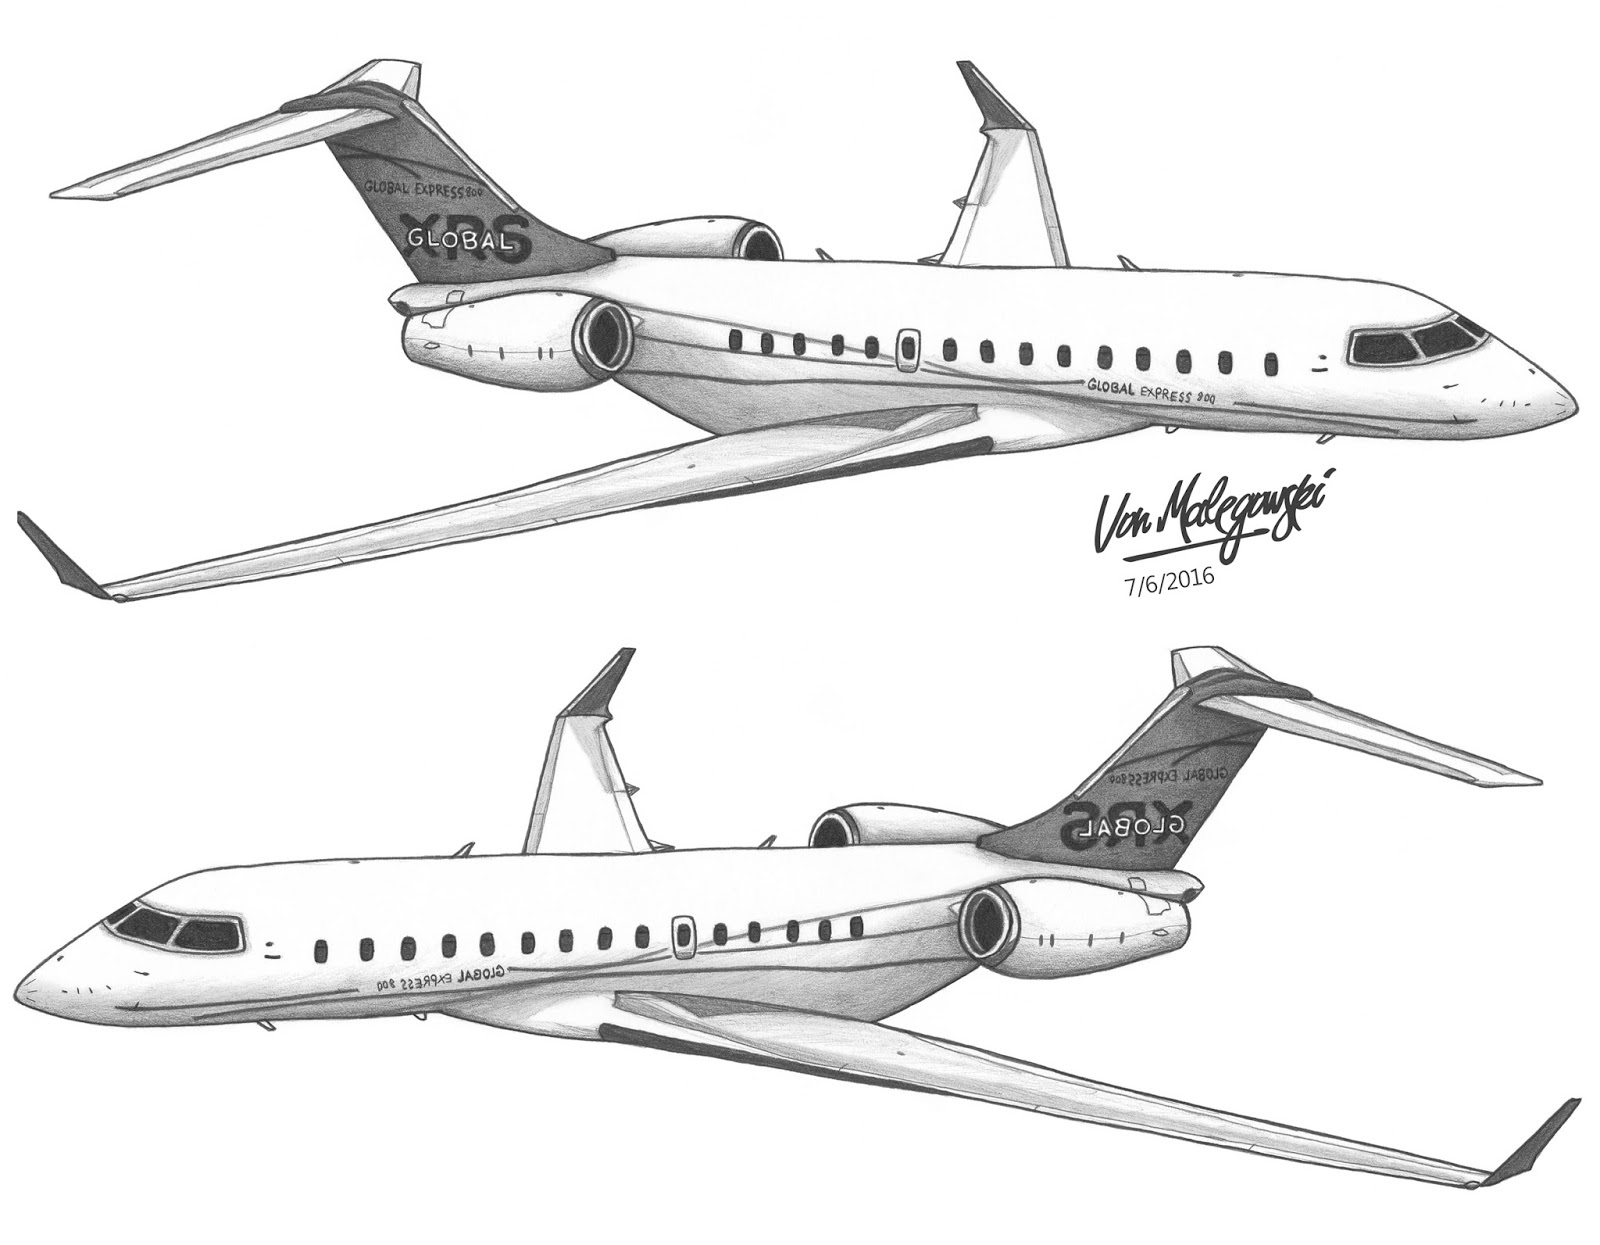
The Bombardier Global Express is a large cabin, ultra long range business jet manufactured by Bombardier Aerospace in Toronto, Ontario, Canada. There are currently three variants in active service the original Global Express, Global 5000 & Global 6000 and two more under development the Global 7000 & Global 8000. The Global 6000 (formerly marketed as the Global Express XRS) is an improved version of the original aircraft offering higher cruise speed, increased range, improved cabin layout and lighting. The Global Express can fly intercontinental ranges without refueling or between most two points in the world with only one stop. https://en.wikipedia.org/wiki/Bombardier_Global_Express
The Bell 206 is a family of two-bladed, single- or twin-engined helicopters, manufactured by Bell Helicopter at its Mirabel, Quebec plant. The Bell 206B-3 Variants has upgraded Allison 250-C20J engine and added 2 inches (51 mm) to tail rotor diameter for yaw control. https://en.wikipedia.org/wiki/Bell_206
The Kawasaki Ninja 300 or EX300 is a 296 cc (18.1 cu in) Ninja series sport bike introduced by Kawasaki in 2012 for the 2013 model year. This is the 2016 model. https://en.wikipedia.org/wiki/Kawasaki_Ninja_300
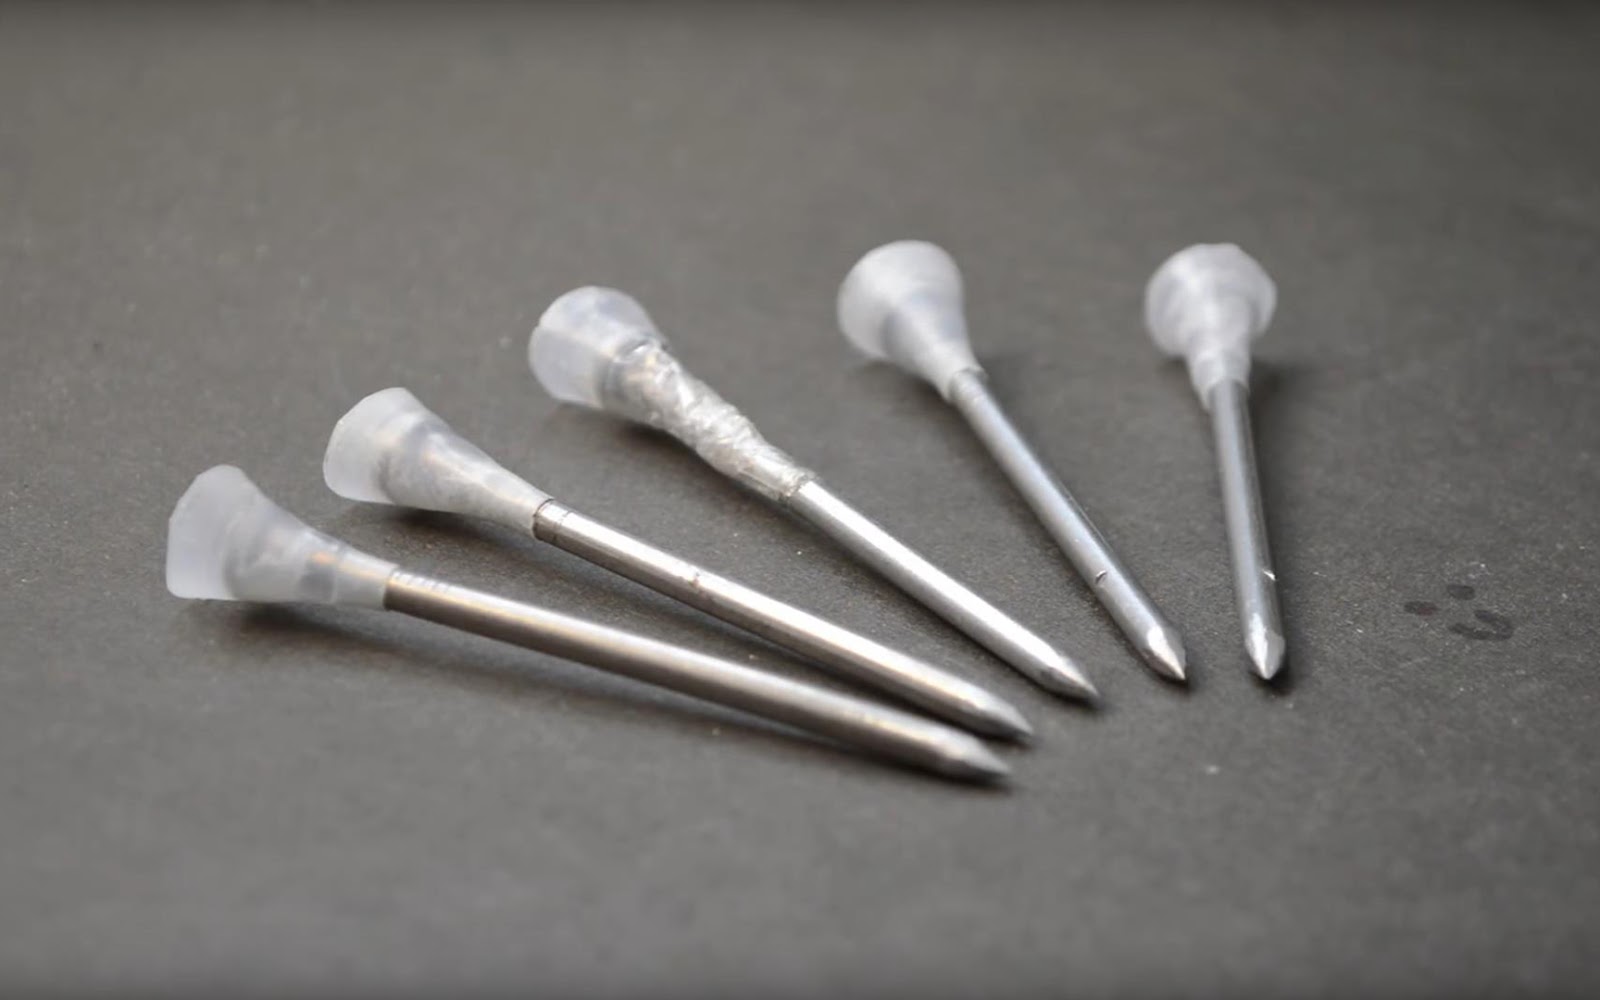
I show how to make 3 different types of blowgun and air-gun
darts. They are all made with common house hold materials and are simple to
make. They work with a blowgun or an air-gun and can be made larger or smaller
depending on the diameter of the blowgun tube. I used nails for all of my darts
but a thin metal rod or other materials can be used. This is more to show how
to make the different dart stabilizers that can then be made with more suitable
darts depending on weather a pneumatic dart gun or blow dart gun is used. I
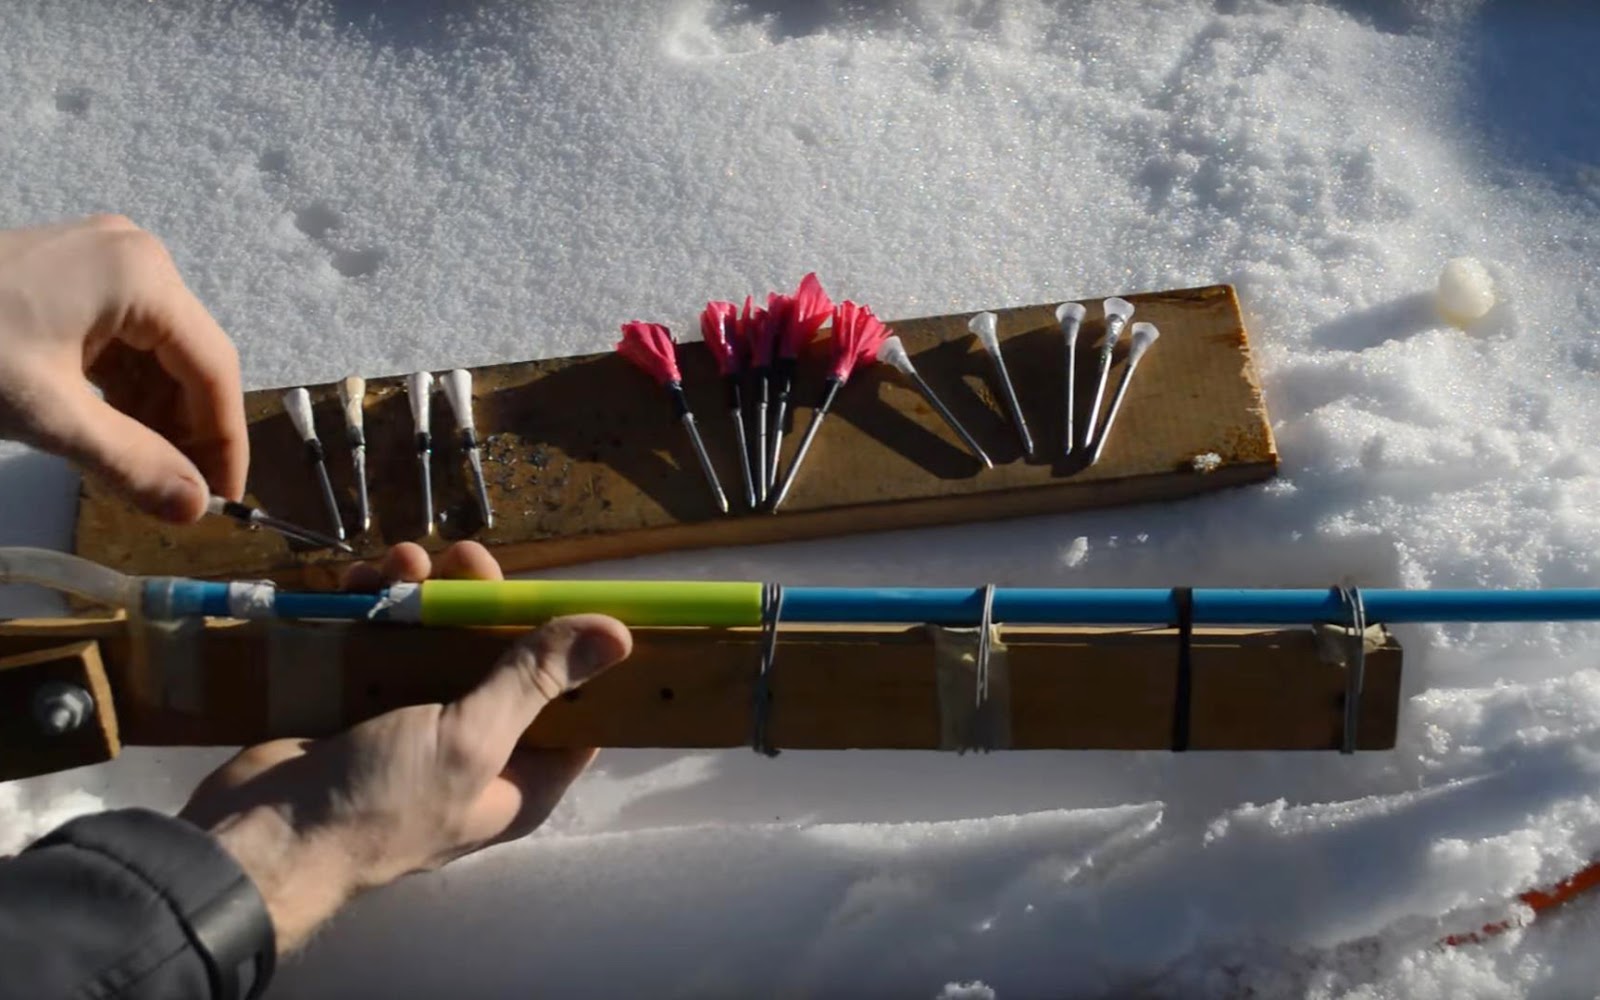
tested them from a homemade air gun shooting them into a frozen wood stump and
they all performed well. If I was using a blowgun I would make them with
smaller thinner nails or thin metal rods so that they are lighter. Be careful
these can be potentially dangerous, use common sense if making/using these.
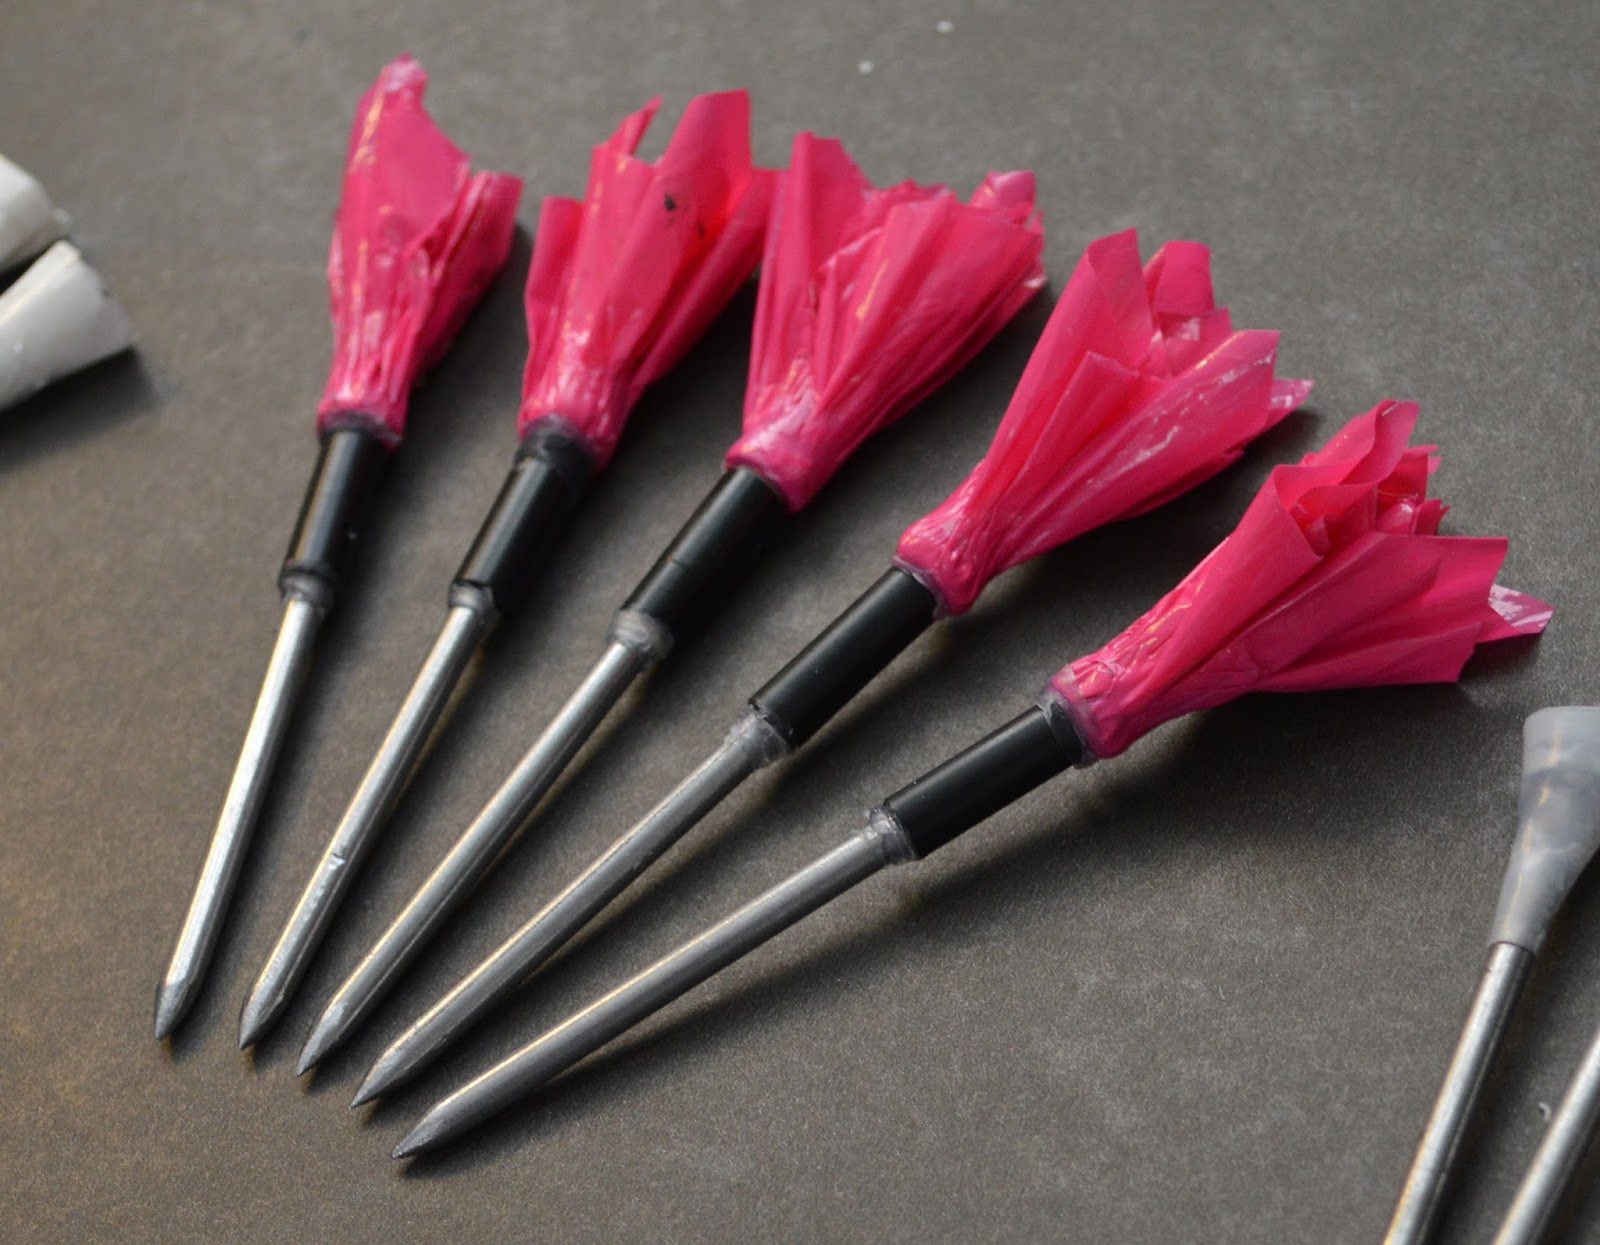
Blow Dart #1
This dart is made from a piece of cardstock paper that is made on to a cone then glued into the end of a nail. a small plastic tube is added, this piece is not necessary it just makes it look a little better. then the cone and tube are covered in clear tape. this makes the cardstock cone more durable. Blow Dart #2
This dart is made from a plastic bag. The bag was thick plastic and cut into a few small squares that are pressed in to the nail and glued in place. A small plastic tube is added to the nail. A bright color plastic can be used to make the darts easy to locate. Blow Dart #3
This dart is made from a plastic milk carton. The milk carton is heated up making it malleable and a skewer can be used to make it into a cone shape. the cone shape is cut out and glued to the nail.
A Blowgun can be used to fire darts, Often, these are quite small, and do little harm by themselves; instead, they are effective due to poison spread onto their points, from (for example) dart frogs or curare.
Materiasl: - Card-stock Paper - Tape - Nails/Thin Metal Rod - Small Plastic Tube - Glue/Epoxy - Plastic Bag - plastic from a milk carton.
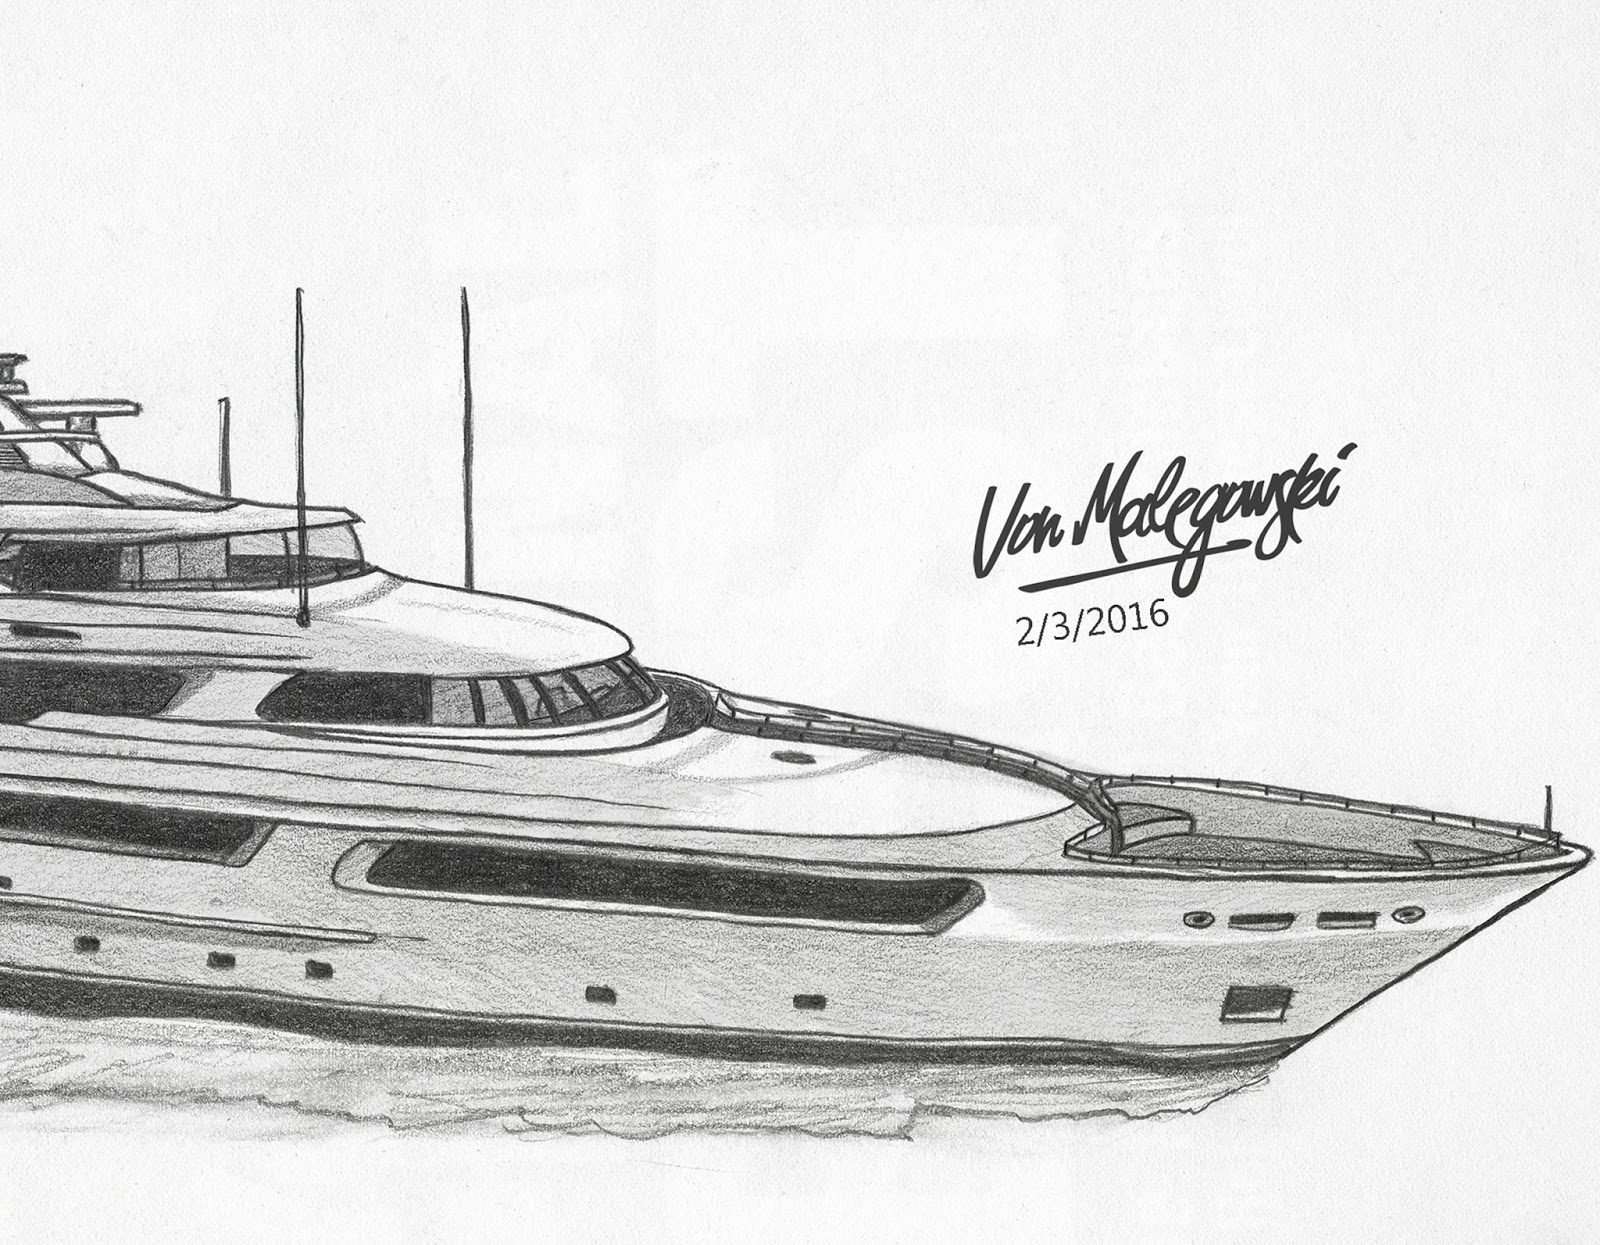
A drawing of a luxury yacht. A luxury yacht is a very expensive, privately owned, professionally crewed sailing or motor yacht. There is no industry-wide standard for the difference between super-yacht and mega-yacht. The only legal distinction is between yachts above 24 metres (79 ft) and below, as in some countries those above 24 metres must have a permanent crew on the boat. (https://en.wikipedia.org/wiki/Luxury_yacht)
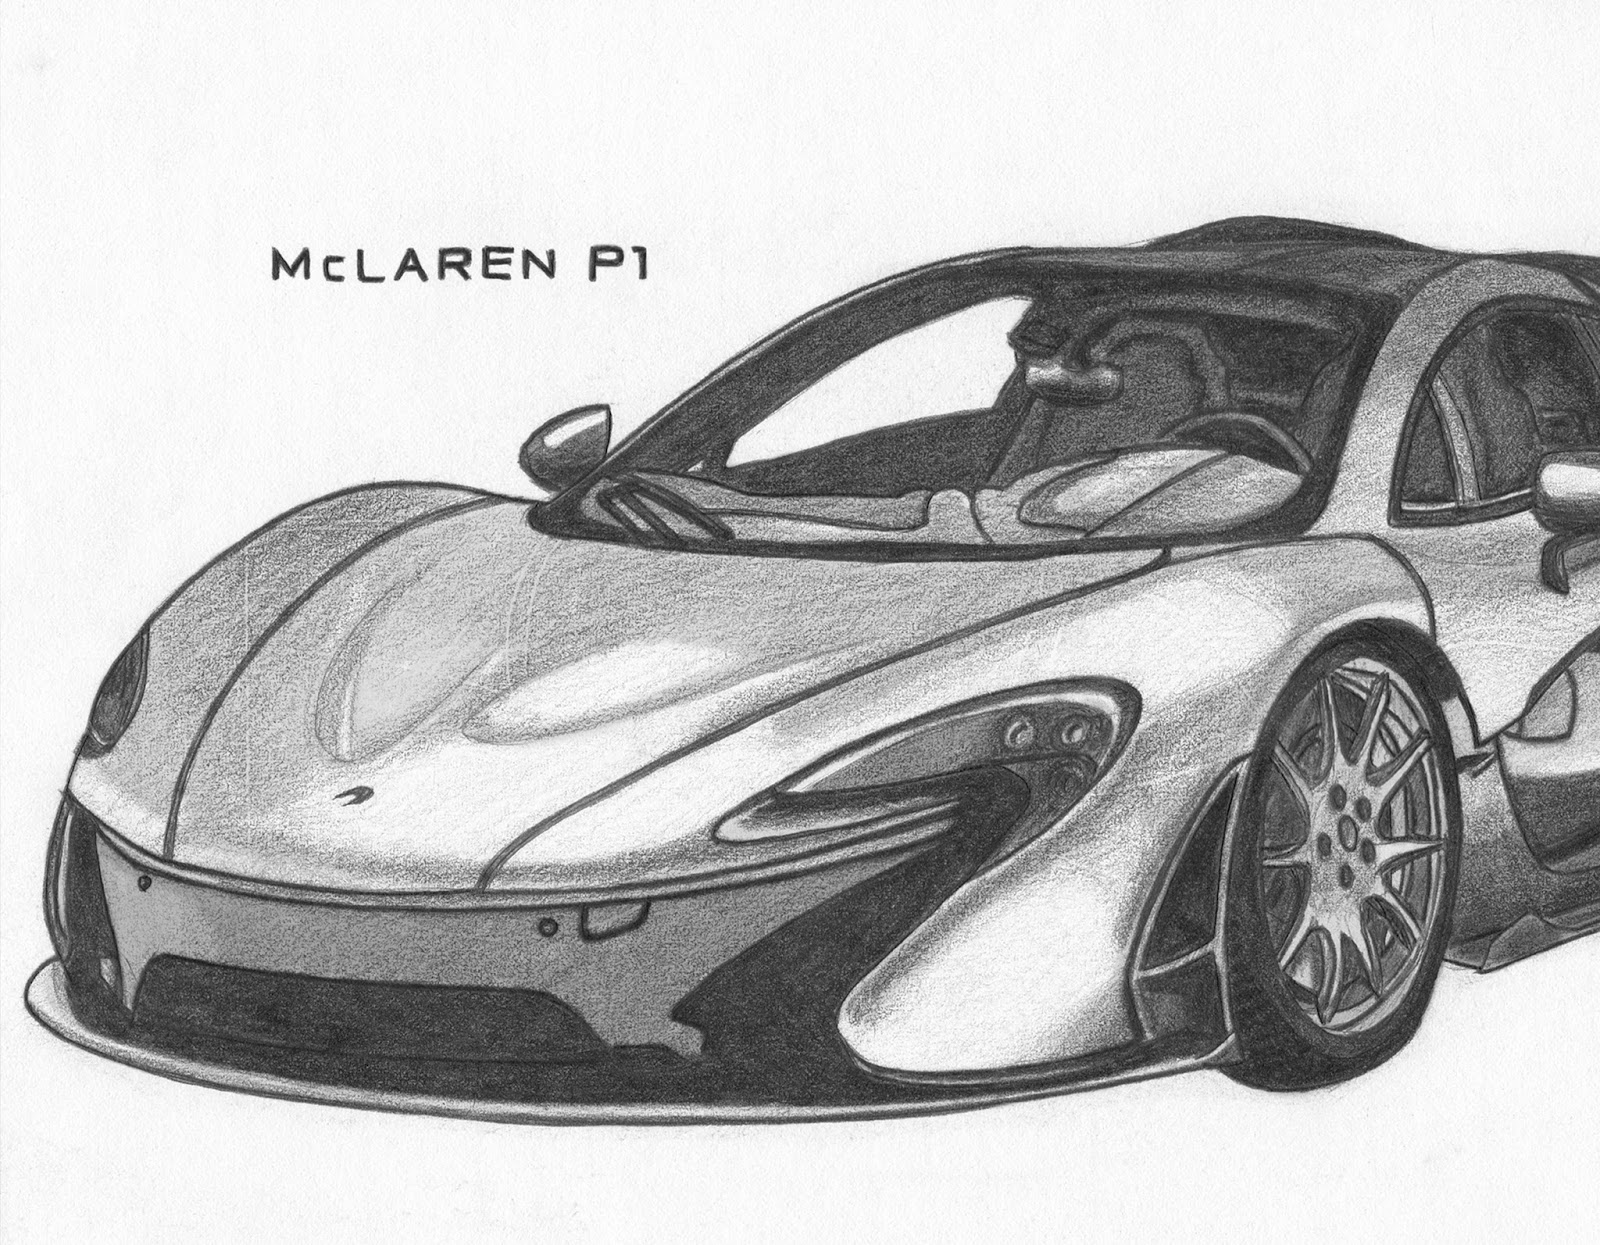
The McLaren P1 is a limited production plug-in hybrid sports car manufactured by British car manufacturer McLaren Automotive. The concept car was capable of reaching speeds of 218 mph (351 km/h) with the limiter on. It debuted at the 2012 Paris Motor Show and the production run ended in December 2015. (https://en.wikipedia.org/wiki/McLaren_P1)
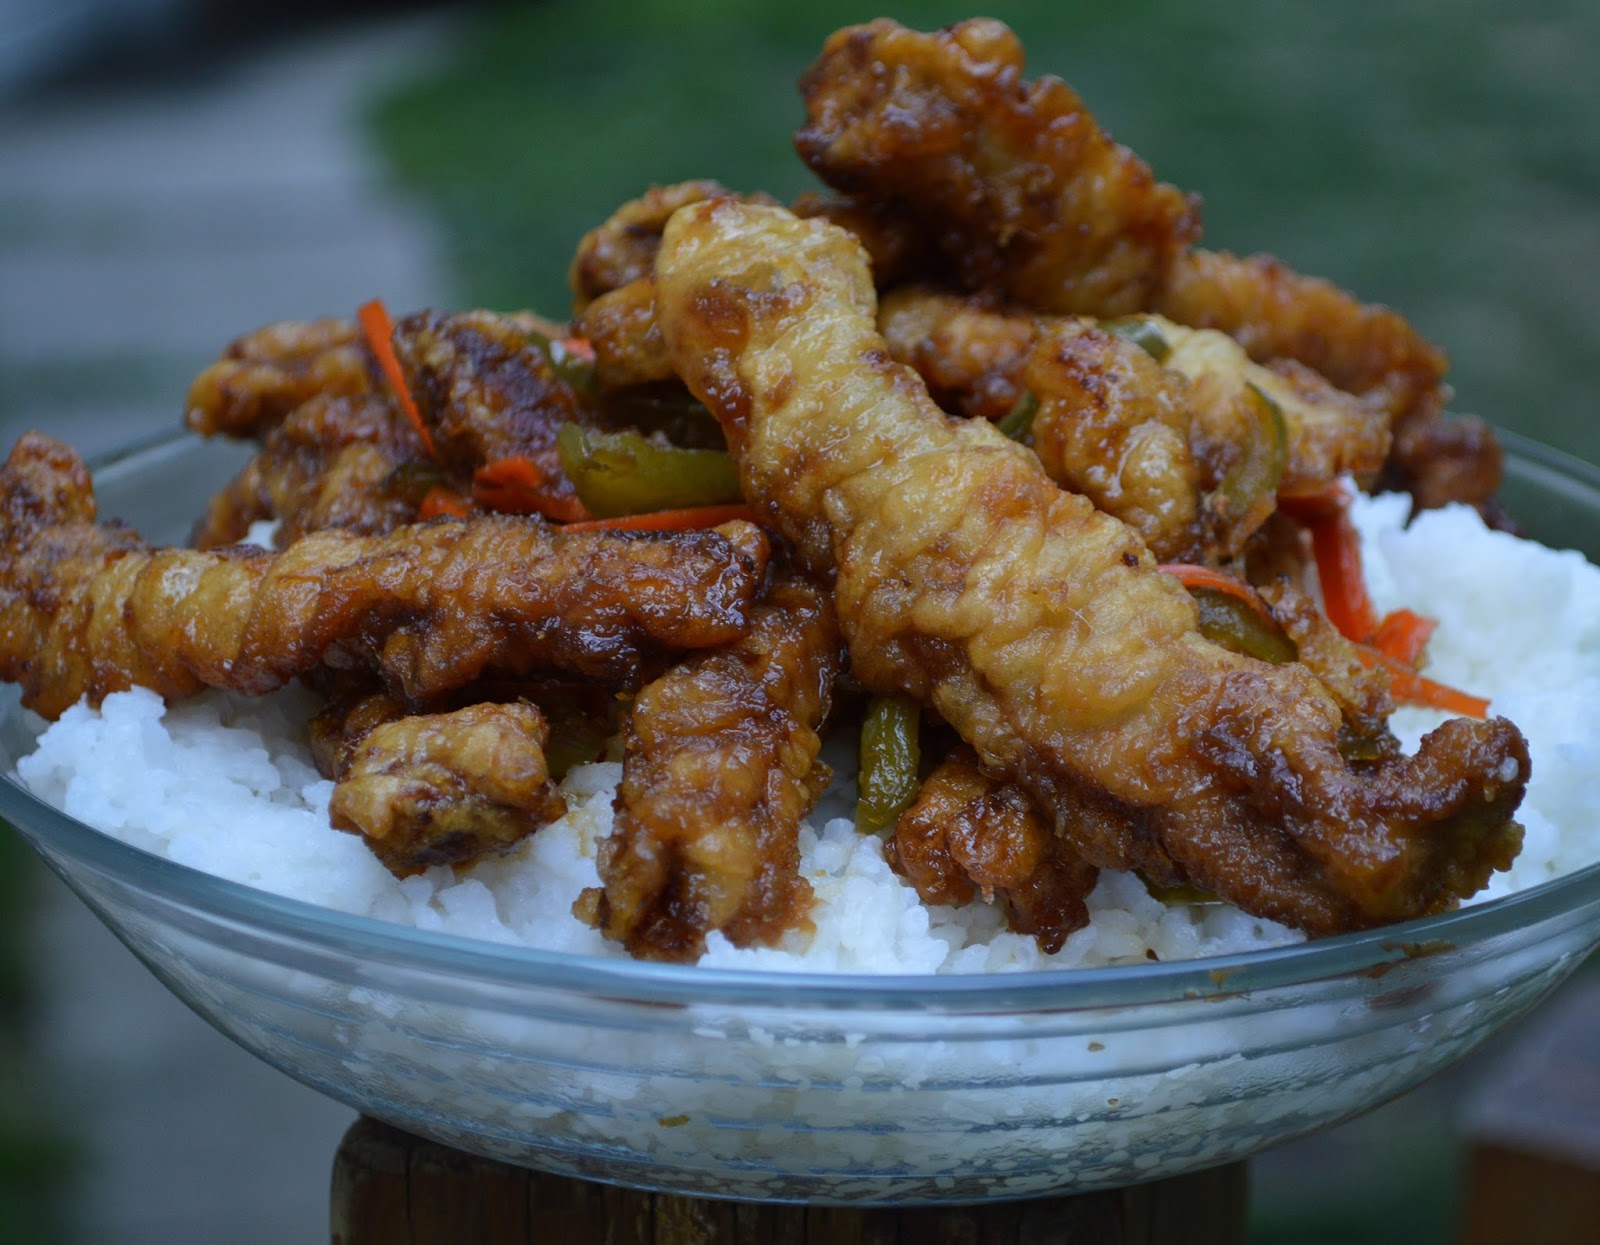
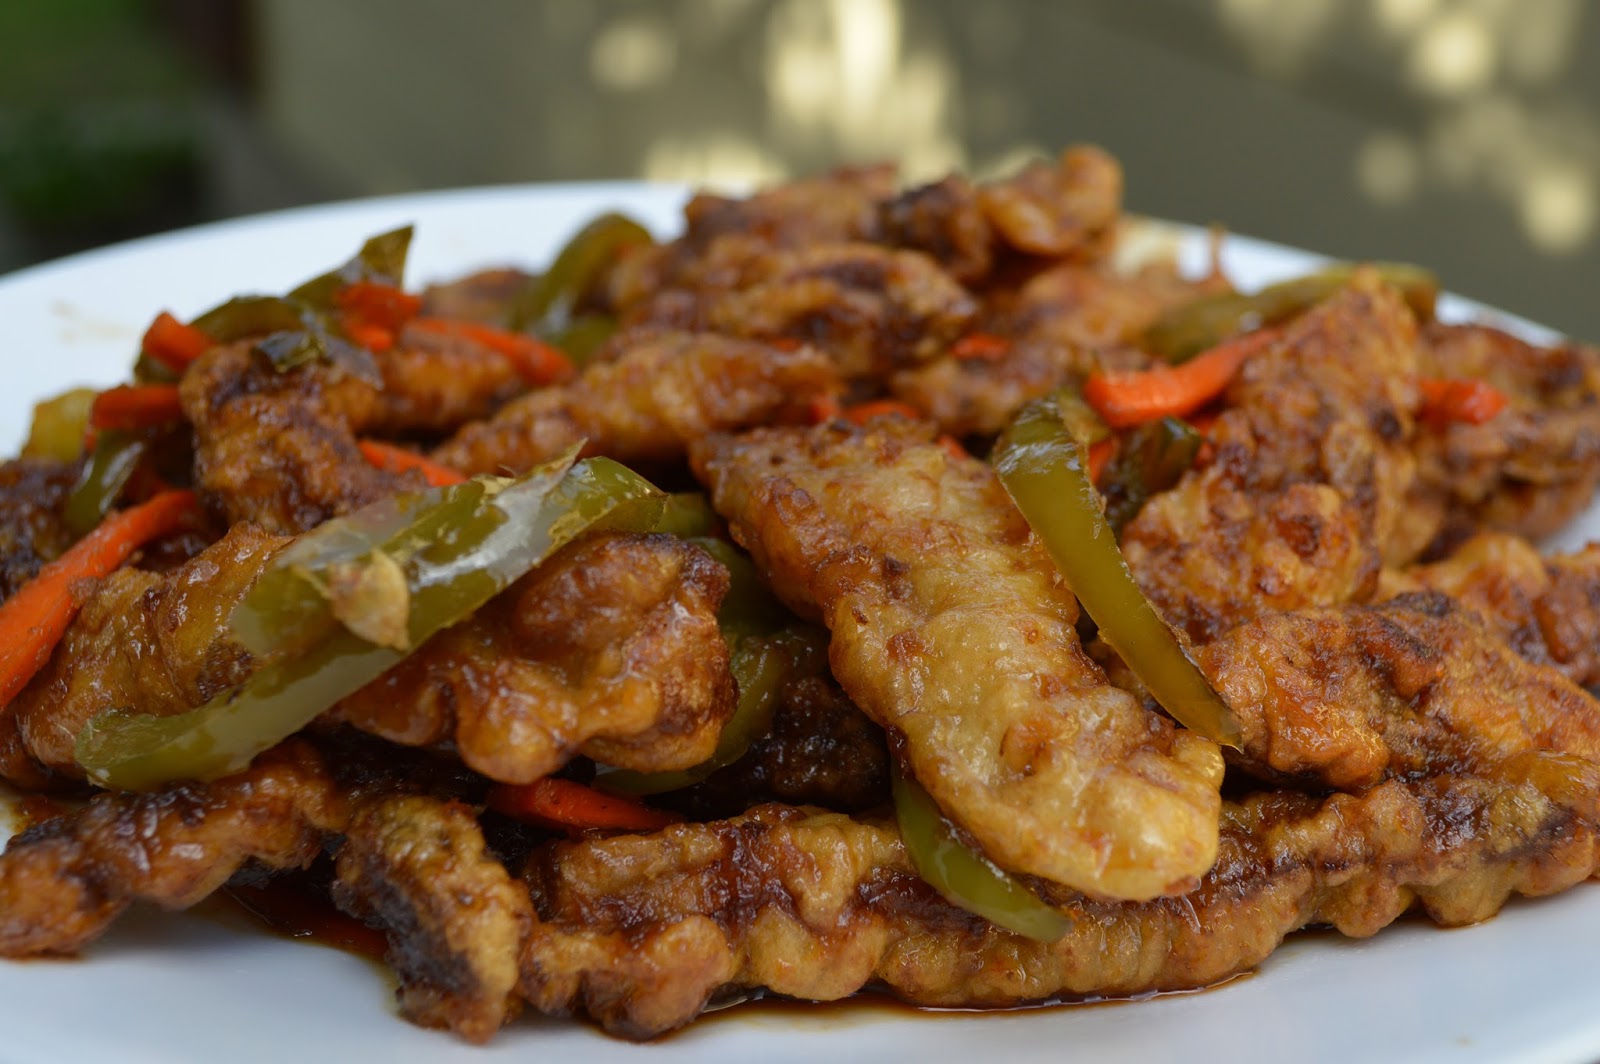
I show to make crispy ginger beef, a westernized version of a Chinese dish made from beef and ginger. The western Canadian version generally consists of deep-fried beef strips coated in a crunchy batter and covered with a sweet, spicy sauce that is reminiscent of other Asian sauces based on vinegar and sugar. It also contains flavours of ginger, garlic and hot peppers, and is commonly served with a small amount of julienned carrots and onions in the sauce. As with many dishes, the invention of ginger beef is claimed by several restaurants and chefs. However, the most widely accepted origin attributes the dish's development during the mid-1970s by Chef George Wong at the Silver Inn in Calgary, Alberta. There are many variations on ginger beef that can be made, and although they all share the same basic ingredients they can taste somewhat different from each other. If this doesn’t taste like what you get from your local take out store just play with quantities of ingredients a little and you should get close. (https://en.wikipedia.org/wiki/Ginger_beef) Step 1: Ingredients/Materials - 1 Pound Beef - 1 Carrot - 3 Dried Red Chilli Peppers - 2 Tablespoons fresh Minced Ginger - 3 Cloves Minced Garlic - 1 Teaspoon Sesame Oil - 1 Green Bell Pepper - Wok - Skillet /Frying pan Batter: - 2 Eggs - Cup Water - 1 Cup Cornstarch Sauce: - 3 Tablespoons Soy Sauce - 3 Tablespoons Vinegar - 3 Tablespoons Sugar - 1 Tablespoon Sesame Oil
Directions: 1. Slice beef into matchstick strips, cutting along the grain. (The meat is easier to cut if it is partially frozen). 2. Cut the carrot and bell pepper into thin strips. Mince the ginger, garlic and dried red chilli peppers. 3. Mix the sauce ingredients. Set aside. 4. Beat the egg white and add water. Add cornstarch. Mix the batter thoroughly. Drop the meat in to the batter. Heat wok. When heated, add 4 - 5 cups of oil. When the oil is ready, add 4 -5 pieces of the meat at a time. Deep-fry the beef until golden brown. Remove and set aside. Let the oil come back to original temperature and add more meat. 5. Heat and add 1 tablespoon oil to the wok. When oil is ready, add the ginger and stir fry for 10-15 seconds. Then add the garlic and chilli pepper, fry for 10-15 seconds. Add the carrots and bell peppers then begin stir-frying. Pour in the sauce and let come to a boil and reduce in volume. Add the deep-fried beef. Toss quickly, and remove.
Tips for Making Crispy Ginger Beef: 1. To make it extra crispy, deep-fry the beef twice. This technique is often used in restaurants where they prepare a batch of ginger beef and set it aside. When a customer places an order, a portion is deep-fried again. 2. Don’t put all of the meat in the pan at once. It will lower the temperature of the oil. Start with adding about 4 or 5 pieces of the meat at a time. 3.Mix the batter thoroughly. Test with chopsticks or a wooden spoon – it should just drop without sticking. Watch the video: https://youtu.be/flVxepSG7aU
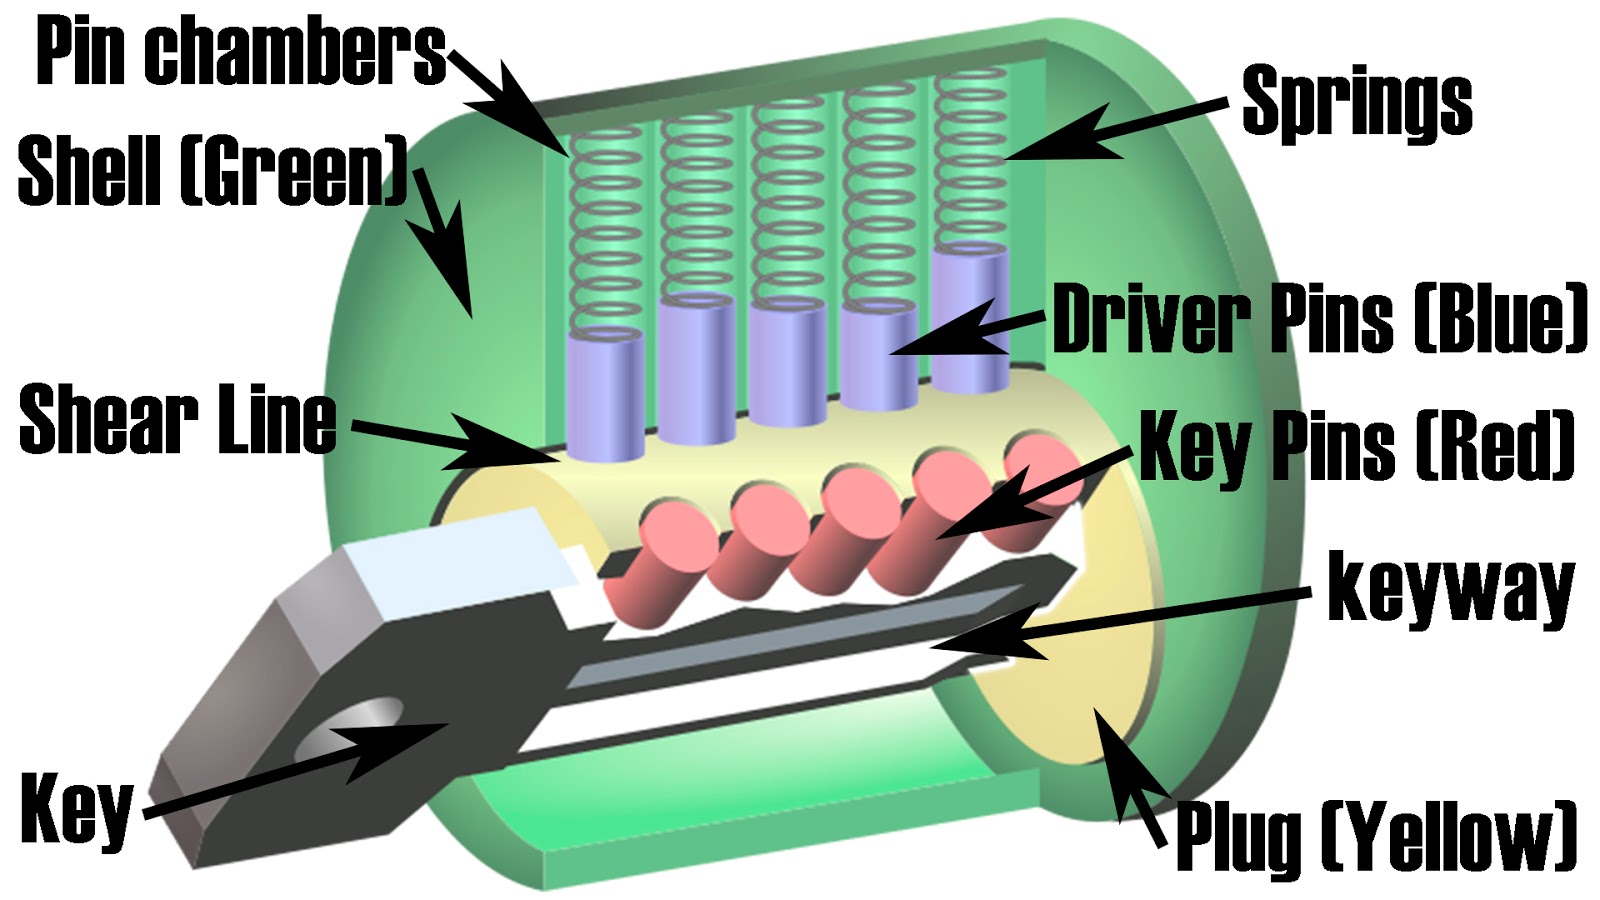
I show how pin-tumbler locks work and how they can be opened using lock picks. This is a fairly basic view about lock picking but I wanted to make it comprehensive to give people a good idea of the concepts. As well as a foundation for beginners in lock picking to get a better view of how a lock works and how it can be exploited. The pin-tumbler is a very common lock mechanism that uses pins of varying lengths to prevent the lock from opening without the correct key. Most locks around the home or office are simple pin-and-tumbler locks and can be relatively easy to open using a pick and a tension wrench. While the process is simple and can be mastered with practice, picking such a lock requires a great deal of patience. It can be a hobby as well as a practical skill. Locksmiths define lock-picking as the manipulation of a lock's components to open a lock without a key. To understand lock picking you first have to know how locks and keys work. Most locks are based on fairly similar concepts but they do come in all shapes and sizes, with many design variations. As this is just to cover the basics I don’t go over security pins or more advanced techniques. This is for educational purposes only. Lock picking is the art of unlocking a lock by analyzing and manipulating the components of the lock device without the original key. In addition, ideal lock picking should not damage the lock itself, allowing it to be re-keyed for later use, which is especially important with antique locks that would be impossible to replace if destructive entry methods were used. Although lock picking can be associated with criminal intent, it is an essential skill for a locksmith, and is often pursued by law abiding citizens as a useful skill to learn or simply a hobby. The move towards combination locks for high security items such as safes was intended to remove the weakest part of the lock: its keyhole.
How a pin-tumbler lock works:
When the key is inserted.
When the key is turned.
When the wrong key is put into the lock.
A pin-tumbler is a cylinder based lock design that uses movable pins to prevent rotation of the plug. A key is used to properly elevate pins to allow the plug to rotate and the locking bolt to be retracted. Pin tumblers are a series of pin stacks pushed down by a spring. Each stack must be properly raised to allow pins to separate at the shear-line. Once all pin stacks are separated the plug can freely rotate and actuate the locking bolt to lock or unlock the lock. An incorrect key will not align all components correctly; rotation of the plug will be blocked at the shear-line.
- Key pins (bottom pins): The pins that are touched by the key. Key pins are sized differently corresponding to the different depth cuts on the key. When the correct key is inserted, all key pins are aligned at the shear line, allowing the plug to rotate.
- Driver pins (top pins): The pins placed between the key pins and the springs. In their resting position, the driver pins block rotation of the plug. In more advanced pin-tumblers, driver pins may be sized inverse to the key pins to defend against decoding and attacks via comb picks.
- Springs: Springs placed above the pin stacks push pins down to their resting position, ensuring that pins cannot be trapped above the shear line while the plug is in the default position.
- Plug: The plug is the inner piece of the lock that rotates upon insertion and tension of the correct key. The plug is connected to the cam to actuate the bolt mechanism when rotated.
- Cylinder: The cylinder is the outer piece of the lock that houses the upper pin chambers and the plug. Driver pins and springs are trapped in the cylinder's pin chambers when the correct key is used and plug rotated.
- Cam: The cam is an extension connected to the back of the plug which actuates the bolt mechanism to lock or unlock the lock.
The diagrams and information on pin-tumbler locks: